
Homework 1B
Homework 1B.
While there are instructions provided within this assignment, there is a lot of background material you really must have read to follow each step successfully. If you haven’t gone through that material, STOP, and do that. I do not spell out each step, and there are purposeful gaps meant to challenge you and make you think some. So fill in the gaps. You may mess up your directory tree. In that case, you can either start-over, or you can use Unix commands to fix. Your homework is automatically graded, so make sure you pay attention to names. One typo and program fails. So typos count against you, and you do not get credit if it is close. Similarly, your programs won’t work if they are close.
The homework is due August 27, 8AM as a tar.gz file to Blackboard of your assignment1 folder after completing the steps below. A tar.gz folder is created typically by using the program tar, such as tar -cvfz myfile.tar.gz path/to/mydirectory. You’ll need to use rsync to transfer the file from the trgn.usc.edu server to your computer for uploading.
Create new Github Repository
- Create a new github repository on https://github.com called
trgn510_assignment1.
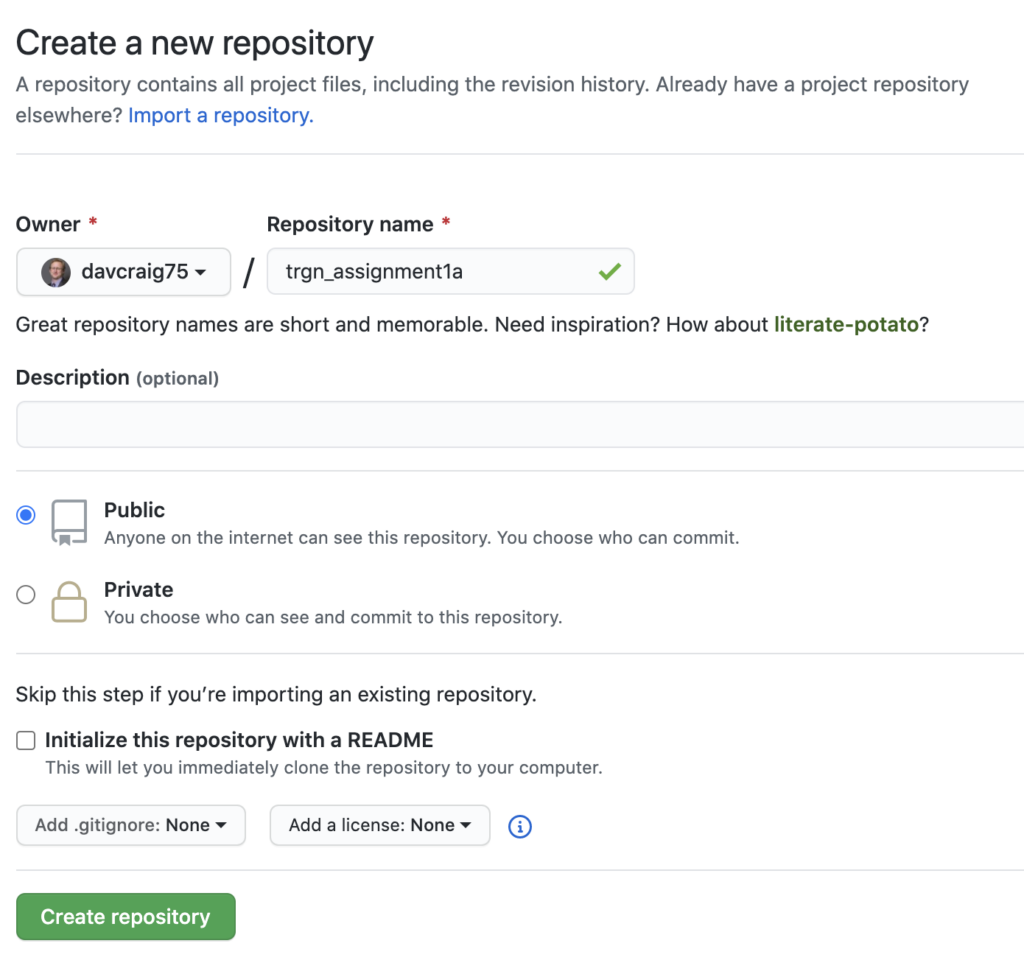
Click create repository.
Setup Assignment Folder
- Make a folder called
assignmentsin your home director usingmkdir. - Within
assignments, make a directory calledtrgn_assignment1andcdinto that directory. - Initialize your repository
echo "#trgn510_assignment1" >> README.md
git init
git add README.md
git commit -m "first commit"
git remote add origin https://github.com/davcraig75/trgn510_assignment1.git
git push -u origin master
- With
vi, edit the README.md file to read Create a file calledREADME.mdwithin yourassignment1directory usingvimwith the following contents:#trgn510_assignment1
This directory contains my first assignment in Fall 2020 TRGN510 - Make your first commitment of the directory tree to
git. First add the files.git add . -A - type:
git commit -m "First commit" - Type:
git push origin master
Problem 1
- Create a directory called
problem1within the~/assignments/trgn_assignment1folder. Type:history.
- Create a file called
myhistory.txtwithin the~/assignments/trgn_assignment1/problem1folder using redirect>symbol, such ashistory > myhistory.txtnot forgetting to be in the correct folder when you do this.
Problem 2
- Create a folder called
problem2within your~/assignments/trgn_assignment1/folder. Copy a file elsewhere on the server into this directory usingcp /data/bashrc ~/assignments/trgn_assignment1/problem2/. - Change directories into
~/assignments/trgn_assignment1/problem2/.and typels -lawhere the-laprovides you more information about permissions and hidden files. - You want to edit the
bashrcfile, which is your settings file. Right now its not active because its not in the right place and with the right name. It must be in your home directory and have the name.bashrc. Note that the preceding.character makes it hidden from standardls. This file is a series of bash commands run whenever you start linux. Let’s add a welcome message. Use vim to add a line at the very end so that we always know when we have login to the server. Go to the end of the file (type G, if escaped), and add the line to thebashrcfile: echo “Welcome. You are $USER on $HOSTNAME” - Its always good to know what operating system you are in. Lets add that too. Type
cat /etc/*releasewhich should give:
CentOS Linux release 7.7.1908 (Core)
NAME="CentOS Linux" VERSION="7 (Core)"
ID="centos" ID_LIKE="rhel fedora"
VERSION_ID="7"
PRETTY_NAME="CentOS Linux 7 (Core)"
.ANSI_COLOR="0;31" CPE_NAME="cpe:/o:centos:centos:7" HOME_URL="https://www.centos.org/" BUG_REPORT_URL="https://bugs.centos.org/" CENTOS_MANTISBT_PROJECT="CentOS-7" CENTOS_MANTISBT_PROJECT_VERSION="7" REDHAT_SUPPORT_PRODUCT="centos" REDHAT_SUPPORT_PRODUCT_VERSION="7" CentOS Linux release 7.7.1908 (Core) CentOS Linux release 7.7.1908 (Core) - That is too much info to provide every time we login, so let us just type the first line by piping into the program head. Test out
cat /etc/*release | headwhich gives you the first 5 lines. I would like you to figure out how to change this command to make it just 1 line. Please place that line as the last line in your file~/assignments/trgn_assignment1/problem2/bashrc
-
-
- Test out your new bashrc file typing
source ~/assignments/trgn_assignment1/problem2/bashrcand your prompt should change. This basically just ran every line in that file using bashrc. You should see something like:
- Now lets install it such that it runs every time we go into this server by giving it the right name and the right location:
cp ~/assignments/trgn_assignment1/problem2/bashrc ~/.bashrc - Lets now add a setup file for
vim. You’ll want to use the example provided at /home/data/vimrc. Please copy this file into your assignment directory:cp /home/data/vimrc ~/assignments/trgn_assignment1/problem2/and inspect it withvimby opening the file. It should look pretty bland. Nowcpthat to your home directory and give it the correct name by typingcp vimrc ~/.vimrc. Now examine the file usingvi. You should see a lot of coloring. This is your new setup.
- Test out your new bashrc file typing
-
Problem 3
-
-
- Create a new directory called
~/assignments/trgn_assignment1/problem 3/andcdinto the directory. Note that there is a space in the directory name and you need to accurately have the space in the directory name. If you typels -lyou should see something like: - Make and change directories into
problem 3. Create a file calledMy History.txtthat contains the output to the commandhistory. Again, no credit will be given if you forget the space and you may have to try this step multiple times.
- Create a new directory called
-

Problem 4
-
-
- Make and change directories into
problem4. No Space! You can see all the programs running right now usingtop, try it out! Now sometimes, we need to know what is running and if our program has finished. Lets list all of the processes of our username by typingps -ef | grep $USER. Ok, now put that output within a file calledmyprocesses.txtthat should be within yourproblem4directory. You’ll need to use redirection. - Let’s edit myprocesses.txt to have a header. Create a header using echo,
echo "# My processes" > header.txt. Now lets put those together:cat header.txt > myprocesses.header.txtand the file should appear in yourproblem4directory.
- Make and change directories into
-
Problem 5
-
-
- Create and cd into a
problem5directory. For the next problem, we will need to download or scrape a webpage. We can usewgetorcurlfor this. Get the following file which is a list of the genes in the genome and their details. Please download the file using:wget ftp://ftp.ebi.ac.uk/pub/databases/gencode/Gencode_human/release_29/gencode.v29.basic.annotation.gtf.gz
- That was a large file, and we can check that it is there using
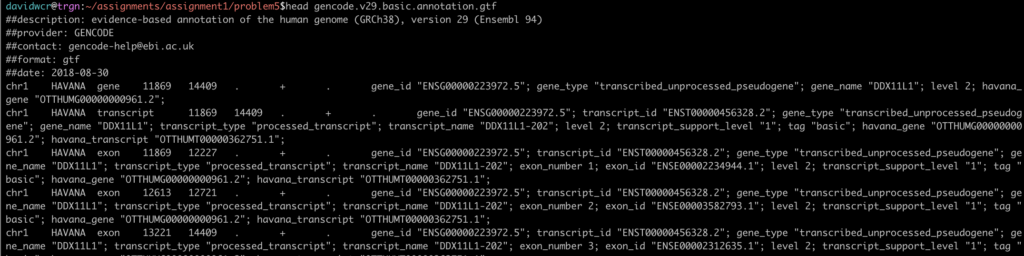
ls -l. How big is the file? It is 24290522 bytes. That is about 24 Megabytes. However, how do we know that its not corrupted? We can calculate a md5sum on the file contents which provides a short set of characters unique to the file. We can do this by typingmd5sum gencode.v29.basic.annotation.gtf.gzand we see a value:00d1c11098c15e8d79fec541afd1dff0. - Lets unzip the file, typing
gunzip gencode.v29.basic.annotation.gtf.gz. Now how big is the file? Typels -l. It is 768007075 bytes. That is about 768 Megabytes. Inspect the file first with head:head gencode.v29.basic.annotation.gtfand we can see the contents:We can also see other things. Inspect the end of the file using tail. Count the number of lines by typingwc -l gencode.v29.basic.annotation.gtf`. Now we notice that there are tabs separating concepts, and there is a termgenein the third column for lines that are gene. How many lines are there that have the word gene in the fourth column? We can use grep to find out, which searches for lines matching. This is tricky though because we need to search for <tab>gene<tab>. The way to encode the <tab> character in linux is withcontrol-vand then press the tab key. You can do that trick with any character, including the enter. key. So now typegrep " gene " gencode.v29.basic.annotation.gtf | wc -l`but before and after the word gene encode the tab character. You are successful if you see there are 58721 genes. Let’s put just those into a file:grep " gene " gencode.v29.basic.annotation.gtf > genes.tmp.txt. - Lets put just the gene names into a file. We can use grep and regular expressions. We learn more about regular expressions later but you can explore the concept at https://www.regex.com. For now, lets use this command:
grep -oP 'gene_name "(.*?)"' genes.tmp.txtwhere we are matching on this pattern. Let’s redirect that result into a file calledgenes.tmp2.txt. If you typehead genes.tmp2.txt, you should see something like:gene_name "DDX11L1"
gene_name "WASH7P"
gene_name "MIR6859-1"
gene_name "MIR1302-2HG"
gene_name "MIR1302-2"
gene_name "FAM138A" - The next step I’d like you to do in
vim.Usingvimyou can do substitutions, and I’d like you to removegene_name "from each line, and the trailing"– hint%s. Now rename this filegenes.final.txt. You should see something like below by typinghead genes.final.txtDDX11L1
WASH7P
MIR6859-1 - Finally, I’d like you to clean up the directory by removing the temporary files and the very large starting file. These are too big for
git. Please type:rm *.gtf *tmp.txt genes.txt *.gz.
- Create and cd into a
-
 We can also see other things. Inspect the end of the file using
 Clean-up
-
- Create a tar zip of your homework directory
trgn_assignment1using the program tar and commandtar -cvzfto a file with the nameassignment1.$USER.tar.gzwhere$USERis your username. - Using the program
rsyncon your personal laptop, transfer the homework tar zip file from thetrgn.usc.eduserver onto your personal laptop. Upload the tar.gz file to blackboard. - Finally, commit all your updates to github, such that you can see your repository on github.com
- Create a tar zip of your homework directory